class: center, middle, inverse, title-slide # 中規模Shinyアプリを作る際の便利機能たち ## Tokyo.R #68 <span class="citation">@汐留</span> ### <span class="citation">@ksmzn</span> ### 2017/3/3 --- class: xlarge ## Who Are You .pull-left[ <center><img src="./img/matoi.png" width="100px"></center> - koshi ([@ksmzn](https://twitter.com/ksmzn)) - 株式会社ALBERT - 頑張っていきましょう - Rおじさん - アナリスト -> エンジニア - Rの仕事が無くなった - おじさん...? - Shinyおじさんで! - 最近はReactを書いたりAWS触ったり。 ] .pull-right[ <center><img src="./img/ds_book.jpg" width="200px"></center> - ↑ マエショリの章を書きました。 - 新人研修にいいぞ - 1人100冊ほど!お願いします! ] --- ## 最近作ったもの1 「ThankYouStars」 .pull-left[ - Rパッケージ。[CRAN](https://cran.r-project.org/web/packages/ThankYouStars/index.html) もあるよ - インストール済の全ての パッケージに対し、GitHubでスターを付けまくることが可能! - スカッとしたい人におすすめ ] .pull-right[  ] --- ## 最近作ったもの2 「codicR」 - RStudioアドイン。 - `devtools::install_github("ksmzn/codicR")` - 「[codic](https://codic.jp/)」のAPIを叩き、日本語を英語に変換する  --- ## 最近作ったもの3 「HOXO-M Card」 - 名刺作成Shinyアプリ - [https://ksmzn.shinyapps.io/hoxom-card/](https://ksmzn.shinyapps.io/hoxom-card/) - 誰でも匿名知的集団ホクソエムを名乗れる夢アプリ - Shiny+magick  --- ## 「確率分布 Viewer 」 リニューアルしました。 [http://statdist.ksmzn.com/](http://statdist.ksmzn.com/)  --- class: xlarge ## 確率分布 Viewer とは? - 確率分布をインタラクティブに触れるアプリ - Shiny + shinydashboard + NVD3.js - 確率分布のパラメータを切り替えてグラフの形状を調べられる - 多くの確率分布に対応! - 平均・分散も表示 - コード公開してます!PullRequest!お願いします! -> [https://github.com/ksmzn/ProbabilityDistributionsViewer](https://github.com/ksmzn/ProbabilityDistributionsViewer)  --- ## DEMO  --- background-image: url("./img/shiny.svg") background-size: 200px background-position: 90% 8% ## Shinyとは??? .pull-left[ - https://shiny.rstudio.com/ - R言語でWebアプリを作れる パッケージ - HTMLやCSSの知識がなくても作れる(あると素敵) - 分析結果の可視化や、ダッシュボードの作成が容易 - RStudioメンバーが作っている ] .pull-right[ <br /> <br /> <br /> <br />  ] --- ## 詳しくは [@u_ribo](https://twitter.com/u_ribo) さんの資料を読もう! (もうこのスライドだけで良いんじゃないかな) <center><a href="https://cdn.rawgit.com/uribo/talk_170722tokyor63/8836e635/slides/slide.html"><img src="./img/ref_uribo.png" width="900px"></a></center> --- ## 本日は - 先程のスライドの続編です - Shinyの新機能をご紹介します - Bookmark - ShinyModule - 自分がShinyアプリをつくる上で、便利だったパッケージをご紹介します - shiny.i18n --- ## 確率分布 Viewer 新機能紹介 新機能1: ブックマーク機能 <center><img src="./img/20180303_TokyoR_demo_pdv02_01.gif" width="900px"></center> --- ## 確率分布 Viewer 新機能紹介 新機能1: ブックマーク機能 <center><img src="./img/20180303_TokyoR_demo_pdv02_02.gif" width="900px"></center> --- ## 確率分布 Viewer 新機能紹介 新機能2: 英語・日本語切り替え機能  --- class: inverse, center, middle ## Bookmark 機能 --- ## Bookmark 機能とは? - ver0.14から追加された新機能 - Shinyアプリの状態をURLに保存できる - 他の人に共有したいときに便利 - Shiny起動時にアプリの状態を復元する - 状態とは、input。 - URLにinputを全て埋め込む方法と、Serverにファイルとして保存する方法が使える --- ## Bookmark ~ URL 埋め込み ~ もっとも単純でわかりやすい方法。 inputの値をクエリパラメータとして埋め込む。 ``` http://statdist.ksmzn.com/?_inputs_&selected_language=%22Japanese%22 &norm-mean=0&norm-sd=1 ``` アプリ起動時に、このURLの値をインプットとし、状態を復元する。 パラメータが多いと、URLが長くなってしまう。 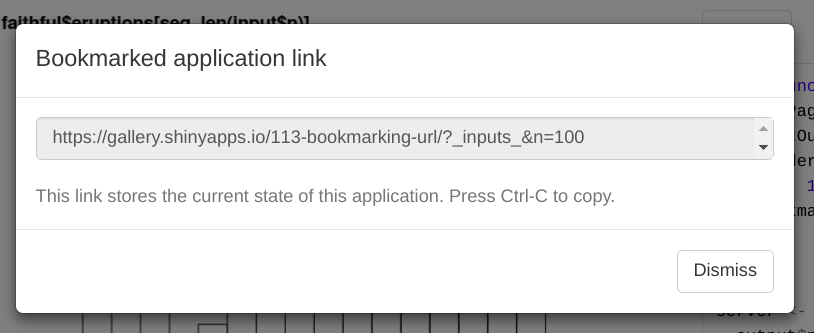 --- ## Bookmark ~ Server保存 ~ ShinyServerにディレクトリを作り、inputをRDSファイルに保存する。 state_idがURLに埋め込まれ、そのstate_idに対応したRDSファイルが保存される。 OSS版ShinyServerの場合、version 1.4.7以降が必要。 shinyapps.ioはまだ対応していないらしい。 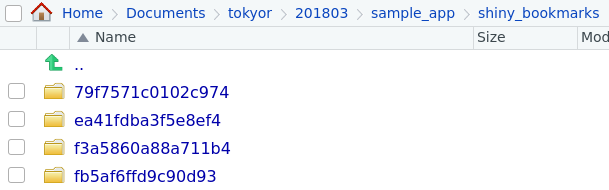 --- ## Bookmarkのシンプル例 ```r ui <- function(request) { fluidPage( textInput("txt", "Enter text"), checkboxInput("caps", "Capitalize"), verbatimTextOutput("out"), bookmarkButton() ) } server <- function(input, output, session) { output$out <- renderText({ if (input$caps) toupper(input$txt) else input$txt }) } shinyApp(ui, server, enableBookmarking = "url") ``` [shiny公式サイト](https://shiny.rstudio.com/articles/bookmarking-state.html)の例 --- ## Bookmarkの書き方 (URL埋め込み) やることは2つ。 ① uiのオブジェクトを関数にする ```r ui <- function(request) { fluidPage( textInput("txt", "Enter text"), checkboxInput("caps", "Capitalize"), verbatimTextOutput("out"), bookmarkButton() # ブックマークボタン ) } ``` --- ## Bookmarkの書き方 (URL埋め込み) ② `enableBookmarking()` 関数を呼ぶか、 `shinyApp()` 関数の引数に指定する app.R ```r shinyApp(ui, server, enableBookmarking = "url") ``` global.R ```r enableBookmarking(store = "url") ``` server保存の場合、「url」でなく「server」に変更する。 --- ## shinydashboardで使えるの? 使える。 shinydashboardは、メニューの開閉状態をinputとして格納している。 inputに入れているということは、問題なくbookmark機能を使える。 `sidebarMenu()` に `id` を指定する必要がある。 ```r sidebarMenu(id = "sidebar", .... ) ``` --- ## Bookmarkする値を選べるの? `setBookmarkExclude()` で除外できる。 デフォルトでは全てのinputをブックマークしてしまう。 大きなアプリの場合、URLが長くなるし復元がに時間がかかる。 除外したいinputを `setBookmarkExclude` 関数で指定する。 ```r setBookmarkExclude(c("x", "y")) ``` `input$x` と `input$y` はブックマーク対象から外れる。 --- ## さらにBookmark機能を使う 様々なタイミングで実行されるcallbackが用意されている。 #### ブックマークする前 - `onBookmark` #### ブックマークした後 - `onBookmarked` #### 復元する前 - `onRestore` #### 復元した後 - `onRestored` --- ## Bookmark まとめ - Shinyの状態を保存できる機能 - URLに全てinputを埋め込む方法と、 ServerにRDSファイルを保存する方法がある - `setBookmarkExclude()` でinputする値を除外できる。 - callbackを使いこなすことによって、 カスタマイズが可能 --- class: inverse, center, middle ## ShinyModule ### アプリを分割する --- ## ShinyModuleとは - ちっちゃなui.R, server.Rのようなもの。 - [バージョン0.13.0から追加](https://blog.rstudio.com/2016/01/20/shiny-0-13-0/) 。 ## ShinyModuleは何が嬉しいのか - 関数のように再利用できる。 - 似たようなパーツを作る際にコピペせずに済む。 - 複数タブで似たようなページを持つアプリで特に便利(shinydashboard!) - input, outputの名前空間をいい感じに管理してくれる。 関数をよりShinyに特化したものがShinyModuleというイメージ。 --- ## 名前空間がやばい Shinyアプリが大きくなってくると、input・outputのID管理が大変になる  --- ## 名前空間がやばい Shinyアプリが大きくなってくると、input・outputのID管理が大変になる  --- ## 名前空間がやばい でも実は、データが違うだけで右と左は同じ構造をしている。  --- ## 名前空間がやばい ShinyModuleを使えば、名前空間の管理がらくらくになる  --- ## `shiny::NS()` で名前空間を管理する `shiny::NS` 関数は、識別するための文字列を渡すと、Namespace(名前空間)を管理してくれる関数を返す。 ```r > ns <- shiny::NS('result1') > ns('plot') [1] "result1-plot" ``` --- ## ShinyModule ~ 基本の書き方 ~ - UI部分のModuleとServer部分のModuleが必要 - UI側は末尾が `Input` , `Output` , `UI` のいずれか - Server側はそれらの末尾文字列を消したものと同名(か、「Server」をつける)。 ```r # UI irisPlotUI <- function(){ # UIロジック } # Server irisPlot <- function(){ # Serverロジック } ``` --- ## ShinyModule実例 〜 Module無し 〜 .pull-left[ irisのヒストグラムを作るShinyアプリ。 上側にPetal, 下側にSepalの、それぞれ Length か Width のヒストグラムを表示する。 ] .pull-right[ <img src="./img/module_before.png" width="250px"> ] --- ## ShinyModule実例 〜 Module無し 〜 ShinyModuleを使わずに書く ```r library(shiny) ui <- fluidPage( selectInput('petal_col', '列:', c('Petal.Length', 'Petal.Width')), plotOutput('petal_plot'), selectInput('sepal_col', '列:', c('Sepal.Length', 'Sepal.Width')), plotOutput('sepal_plot') ) server <- function(input, output, session) { output$petal_plot <- renderPlot({ hist(iris[, input$petal_col]) }) output$sepal_plot <- renderPlot({ hist(iris[, input$sepal_col]) }) } shinyApp(ui, server) ``` --- ## ShinyModuleを作る ~ UI ~ selectInputとplotを出力するModuleを書く. 1. 第一引数にidを書く 1. `ns` を作成する 1. inputIDを `ns` 関数で包む ```r irisPlotUI <- function(id, cols) { ns <- NS(id) tagList( selectInput(ns('col'), '列:', cols), plotOutput(ns('plot')) ) } ``` --- ## ShinyModuleを使う ~ UI ~ `irisPlotUI` を呼び出し、id と その他の引数を渡す ```r ui <- fluidPage( irisPlotUI('petal', c('Petal.Length', 'Petal.Width')), irisPlotUI('sepal', c('Sepal.Length', 'Sepal.Width')) ) ``` --- ## ShinyModuleを作る ~ Server ~ 通常のServerの書き方に近い。 引数はinput, output, sessionをはじめに書く必要がある。 ```r irisPlot <- function(input, output, session, main){ output$plot <- renderPlot({ hist(iris[, input$col], main = main) }) } ``` `ns` 関数はここでは使わない。 呼び出す際に、勝手にoutputIDを管理してくれる。 --- ## ShinyModuleを使う ~ Server ~ server側の書き方は、少し特殊。 `callModule` 関数の第一引数に Module名、第二引数にid, 第三引数以降にはそのModuleで必要な値を渡す。 ```r server <- function(input, output, session) { callModule(irisPlot, "petal", "Petal Plot") callModule(irisPlot, "sepal", "Sepal Plot") } ``` --- ```r library(shiny) irisPlotUI <- function(id, cols){ ns <- NS(id) tagList( selectInput(ns('col'), '列:', cols), plotOutput(ns('plot')) ) } irisPlot <- function(input, output, session, main){ output$plot <- renderPlot({ hist(iris[, input$col], main = main) }) } ui <- fluidPage( irisPlotUI('petal', c('Petal.Length', 'Petal.Width')), irisPlotUI('sepal', c('Sepal.Length', 'Sepal.Width')) ) server <- function(input, output, session) { callModule(irisPlot, "petal", "Petal Plot") callModule(irisPlot, "sepal", "Sepal Plot") } shinyApp(ui, server) ``` --- ## ShinyModule はどこに書けばいいんですか `global.R` がおすすめ。 「確率分布Viewer」では、`modules.R`というファイルにmoduleを書き、 `global.R` で読み込んでいる。 --- ## ShinyModule + shinydashboard タブページやshinydashboardを使ったページのように、 同じようなページをたくさん作る場合、ShinyModuleは重宝する  --- ## ShinyModule + Bookmark 当然、BookmarkはModuleに対しても機能する。 `onBookmark` などは、Module内部でも定義できる。 Moduleごとにexcludeする値を決められる ```r capitalizer <- function(input, output, session) { output$out <- renderText({ toupper(input$text) }) onBookmark(function(state) { state$values$hash <- digest::digest(input$text, "md5") }) } server <- function(input, output, session) { callModule(capitalizer, "tc") output$out <- renderText({ input$text }) onBookmark(function(state) { state$values$hash <- digest::digest(input$text, "md5") }) } shinyApp(ui, server, enableBookmarking = "url") ``` --- ## ShinyModule まとめ - アプリが大きくなってきたら Module化を検討する - Moduleとは、ちいさなui, serverのようなもの - `shiny::NS` により、名前空間管理が容易に - shinydashboardと併用すると便利 - Bookmark機能も使える --- class: inverse, center, middle ## shiny.i18n ### Shinyアプリを国際対応したい --- ## shiny.i18nとは - i18nはinternationalization(国際化)の略 - `i` と `n` の間に18文字あるから i18n - shiny.i18nはshinyで言語切り替えできるようにするパッケージ - [Appsilon](https://appsilondatascience.com/) 製  --- ## shiny.i18n の使い方 - は無いのでソースとサンプルアプリのコードを読む - やってることは非常に単純 - 文言の対応表をCSVかJSONを用意する - それをDataFrameとして読み込み、 - ShinyのInputに応じて出力列を変える 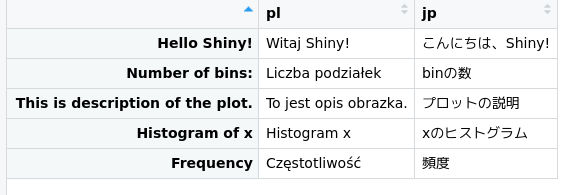 --- ## JSONの例 ```r { "cultural_date_format": "%d-%m-%Y", "languages": [ "en", "pl", "jp" ], "translation": [ { "en": "Hello Shiny!", "pl": "Witaj Shiny!", "jp": "こんにちは、Shiny!" }, { "en": "Histogram of x", "pl": "Histogram x", "jp": "xのヒストグラム" }, : : ``` --- ## shiny.i18n 使い方 Translatorクラスが用意されている ```r > library(shiny.i18n) > translator <- Translator$new(translation_json_path = "./data/translation.json") > translator$translate("Hello Shiny!") [1] "Hello Shiny!" # 日本語に切り替え > translator$set_translation_language('jp') > translator$translate("Hello Shiny!") [1] "こんにちは、Shiny!" ``` --- ## 確率分布Viewerの翻訳 - こんな感じで泥臭く書いている - PullRequest!お待ちしてます! 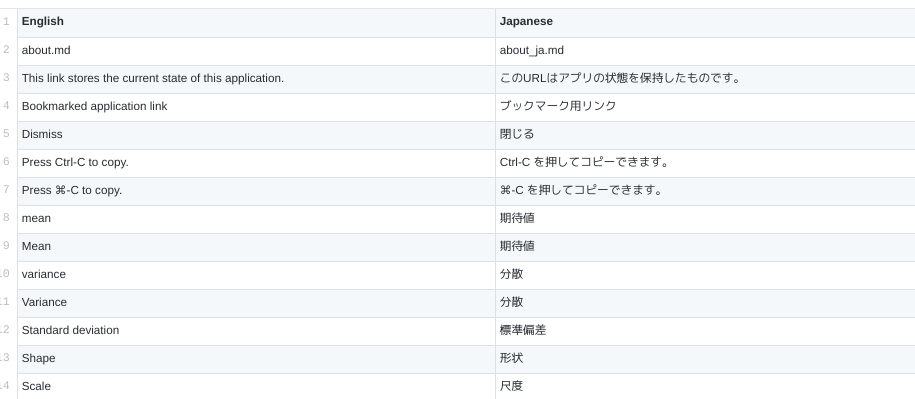 --- background-image: url("./img/appsilon.png") background-size: 200px background-position: 90% 8% ## Appsilonとは???? - shinyのパッケージをたくさん作っている ~~謎の匿名知的集団~~ ポーランド企業 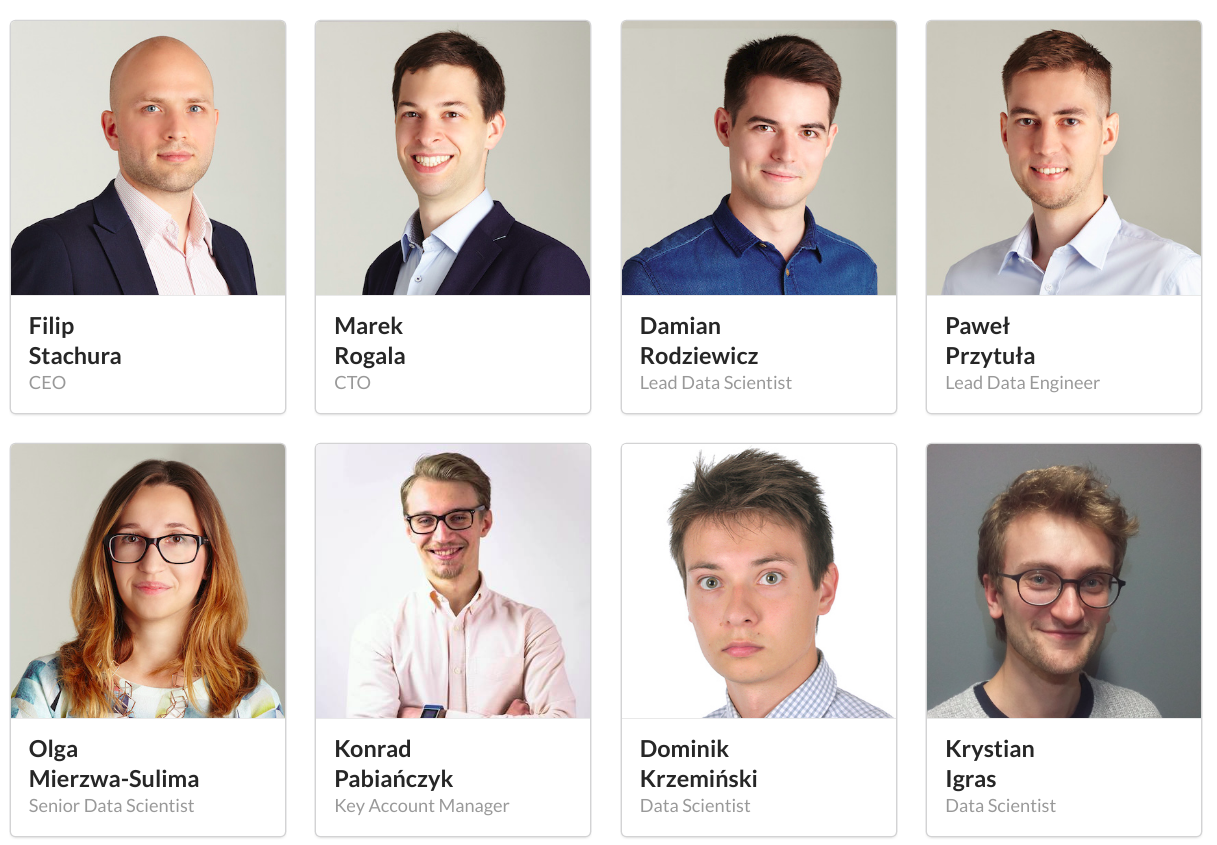 --- ## Appsilon のShinyパッケージ - 開発そんなに活発ではないので、 コントリビュートのチャンス! - 個人的にはshiny-routerは面白い  --- class: inverse, center, middle ## Shinytest ### Shinyアプリをテストしたい --- class: center, middle ## これは次の機会に紹介します! --- ## Shinyアプリが壊れる - コードを変更した - Rをアップグレードした - Shinyをアップグレードした - パッケージをアップグレードした - データを追加した ### -> Shinytestでテストしよう! --- ## Shinytestとは? - アプリをコードで操作し、動作をテストする - 特定時点の画面を記録できる(アプリの正常な状態) - フロントエンドでいうところのスナップショットテスト - テストを実行すると、同じ操作してスナップショットをとり、 正常な画面と比較する --- ## Shinytestの注意点 .pull-left[ - ShinyModuleとうまく動かない - shinydashboardと相性が悪い - 僕はほとんど使えず。。。 - 開発停滞気味? -> 最近はWinston Chang氏がひとりで頑張ってる -> コントリビュートチャンス? ] .pull-left[  ] --- class: inverse, center, middle ## おわりに --- ## 確率分布Viewerの構造 Shinyは大きい規模のコードを公開している人が少ない。 俺こうしてるぜ!な意見お待ちしてます。 - パッケージはどこで読み込むか - 関数はどうまとめるか ``` ├── ui.R ├── server.R ├── global.R # 全部sourceする ├── components │ ├── functions.R │ └── modules.R # ShinyModule ├── distributions # 確率分布 │ ├── index.R │ ├── continuous │ └── discrete ├── i18n/ # shiny.i18n ├── markdown/ ├── utils/ # 便利な関数群 ├── Dockerfile └── www ``` --- ## まとめ - Bookmark機能でShinyアプリを共有しよう! - アプリが大きくなってきたら ShinyModuleを使おう! - 国際化したいときはshiny.i18nを使おう! - Shinytestでテストしよう! --- class: inverse, middle, center background-image: url(./img/kan.jpg) background-size: contain